How to Polish Chrome: A Step-by-Step Guide
 How to Polish Chrome: A Step-by-Step Guide
drivrzone.com
How to Polish Chrome: A Step-by-Step Guide
drivrzone.com
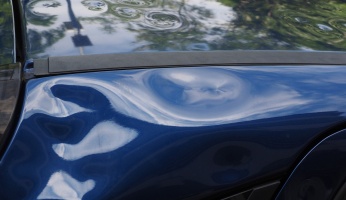
There is no better look for a car than having chrome for all of your metal surfaces. It gives your car a sleek look and an undeniable appeal. There’s a trade-off when you get chrome put on your car, however, and it’s a trade-off that exists with many more luxurious options in life. If you have chrome, you need to keep it clean. The whole point of to have chrome on your car is for those chromed out parts of your car to appear shiny; if it isn’t shiny, it’s not only failing to complete its purpose, it’s actually making your car look worse. After all, if an old rust-bucket has grime and filth all along it, that’s just an expected part of how that car is supposed to look. But if a supposedly sleek, chromed out car is all gross and dirty, it will stick out like a sore thumb and is immediately apparent. Therefore, if you’re going to pay with money to give your car that awesome chrome look, then you also need to pay with your time to make sure that it stays that way. Chrome isn’t the most durable of metals, however, so the whole cleaning and polishing guide to chrome is more complicated than your regular car wash. If you fail to follow instructions, then in trying to make your chrome cleaner, you could actually cause irreparable damage. Stick to the guide step by step, however, and you’ll be assured to have a slick and shiny car that will turn every head as you cruise down the boulevard.
Step #1 – Start With Hot Water
Oftentimes, you won’t need anything intensive to deal with chrome. For now, don’t bother with any fancy cleaners or anything like that. At first, you want to just try to clean off whatever has accumulated with hot water and soap. It might not be enough in the end, but you always want to start with the least abrasive version possible, in order to keep the chrome in the best condition that you can. Therefore, the very first thing you should do is just fill up a clean bucket with hot water until it’s about 2/3rds of the way full.
Step #2 – Add Soap
Depending on the job you’re doing, you might be able to get away with using normal, household soap. Chrome itself will be fine with regular soap, so if the part you are trying to clean is pure chrome and stands on its own, then just grab some regular liquid soap and squirt it into the bucket. If the chrome is attached to a painted area of your car, however, you might need a special soap for cleaning cars, to make sure that you don’t damage the paint. Either will be fine with the chrome, though.
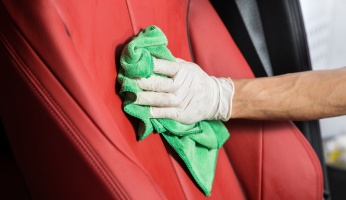
Step #3 – Dampen a Non-Abrasive Rag, Sponge, or Towel
You’ll want to find something smooth to use to clean the chrome. A clean rag will work, as will a sponge or an old towel. Anything you have that won’t scratch the chrome will be preferable. Once you have it, dampen an edge of it into the soapy water. You don’t want the material you’re using to be soaked, just for it to have a bit of soapy water on it.
Step #4 – Rub in Circles on the Chrome
Now you’re going to be doing the actual cleaning part. When you identify the areas on the chrome that need to get cleaned, you’re going to want to do so by rubbing the cloth or sponge in circles on the spot that’s getting cleaned. Never used back and forth strokes, as doing so will leave streaks and won’t give your chrome the shiny look you’re going for.
Step #5 – Always Dry Before Moving On
Each spot that you clean will just be that spot. Your aim is not to clean the entire car, or even the entire chrome piece, in one go, but to do it each spot at a time. After you’ve satisfactorily cleaned each area, dry it with the dry portion of your cloth or sponge before moving onto the next area. You don’t want to leave water on the chrome very long.
Step #6 – Use a Toothbrush to Finish the Job
Not everywhere will be easy to reach, so you’ll need a tool to reach those out-of-the-way spots. A toothbrush is the perfect choice for scrubbing those spots. Make sure that the toothbrush still has its bristles; otherwise, you might end up scratching the chrome with the brush itself.
Step #7 – Appraise the Job
Step back and take a look. Is your chrome perfectly clean and shiny? Often times, that will be all you need to clean the chrome, but if it doesn’t look good yet, it’s time to step up to more powerful cleaners.
Step #8 – Assemble Cleaning Solutions
Soapy water has failed, so now its time to use a bit stronger cleaning solutions. There are actually a number of choices here: baby oil, lemon juice, cola, or specialized chrome cleaners are all potential options to deal with stubborn grime.
Step #9 – Start with the Least Powerful Cleaner
You’ll want to organize your collected cleaners from most to least powerful. Because of the fragility of chrome, the less powerful the cleaner you use, the better. You might need to keep stepping it up, but as a general rule, the less powerful cleaner you can use to successfully get rid of the accumulation, the better it will be for your chrome.
Step #10 – Apply to Your Non-Abrasive Material
Just like the soapy water, you don’t want your material to be soaked in cleaner. Just an edge is best, so you know you’re only using a bit at a time, and have that dry side. You can use the same cloth as you did for the water, as water won’t react with anything, but once you start stepping up cleaning solutions, you’ll want to switch out cleaning materials.
Step #11 – Clean Like You Did With Water
Just like with the water, rub the chrome in circles, making sure that you never use that streak-causing back and forth motion. You’re trying to get rid of grime, so it’s okay to apply a bit of elbow grease, but not so much that you mar the surface of the chrome.
Step #12 – This Time, Rinse Before Drying
You don’t want to dry the cleaner off directly, since that will smear it around and leave a bit of cleaner on the chrome. Instead, after you’ve cleaned each spot, rinse it off with your hot water, drying it afterwards.
Step #13 – Appraise Again
Take a look at the entire chrome piece, identifying where you still have work to do. You might need to step up your cleaning solutions, but you at least will have to clean less and less of the piece as you do so. Keep coming back to this step until you can’t see any dirtiness on the chrome. Rust, you’ll have to take care of next. Once you’re done with that, you can move on to polishing.
Step #14 – Remove Rust With Steel Wool
Rust won’t come off of your chrome the same way that the rest of the messiness does, so you’ll want to save this for last. It also will never quite look the same after you’ve removed rust, so try to avoid it accumulating in the first place. To get rid of the rust, you’ll have to scrub it off with steel wool. It’s hard, and will take a lot of elbow grease, but it must be done. Once there’s no more rust, you can now polish.
Step #14 – Apply Aluminum Oxide to Non-Abrasive Material
Aluminum oxide is available at most auto shops, and that’s the best material that you can use to polish your chrome. In a pinch, however, you can actually use aluminum foil, as both the polish and the polishing rag. Try to stick to the real stuff, though, applying it to your towel, rag, or sponge just like the cleaning solutions.
Step #16 – Wax the Chrome
You need to wax the chrome using, you guessed it, circular motions. The big difference this time, is that you won’t be rinsing them off after every time you wax; aside from that, waxing is much like cleaning, only you don’t need to try to get particular parts off, you’re just waxing for shine.
Step #17 – Remove With a Dry Cloth
Using an entirely separate, dry cloth, you can remove the wax from the whole piece, after you’ve waxed it entirely.
Step #18 – One More Rinse
The last step is to rinse off the whole thing, with a wet towel, or with a hose if you’d prefer. Let the water bead off, and you’re done.
If you care at all about the look of your car, you’re going to want to keep up on its maintenance. That means regularly cleaning the entire car, not just the chrome. Chrome simply takes a bit more of a delicate process, but just like a bit of dirtiness will make your chrome look bad, no amount of shiny chrome will make a filthy car attractive.
Sources
- WikiHow – How to Clean Chrome
- Do It Yourself – How to Polish Chrome