How To Super Clean Your Car Series: Interior Cleaning
 How To Super Clean Your Car Series: Interior Cleaning
drivrzone.com
How To Super Clean Your Car Series: Interior Cleaning
drivrzone.com
A professional vehicle Detailer could charge as much as $500 to return your car to showroom condition. However, it will only cost you a fraction of that to keep your vehicle looking as good as new with these simple steps.
The Tools for the Job:
For many people, their car is like a second home, and you need similar products to clean both.
Cleaning products: You may have some household cleaning products that may work with car interiors, such as carpet shampoo, or leather cleaner. Have a look inside your car at the different surfaces and materials used, and check you have a cleaning product for each. Make sure they are safe to use on vehicle interiors.
Wiping and polishing cloths: The best products to use are the modern microfiber cloths that are cheap and readily obtainable at any hardware store or supermarket. Make sure they are clean and free of any residual chemicals when you start.
A selection of brushes: A car may be sleek on the outside, but the inside cabin can often have lots of hard to get at places where dust and dirt can accumulate. Ventilation ducts are a prime example. So, you’ll need a variety of brushes to thoroughly clean the passenger compartment.
Vacuum cleaner: If you have one with an extension hose, and various attachments are ideal. If your vacuum also has a steam cleaner attachment that would be useful too.
Can of compressed air: Handy for getting dust and dirt out of air vents on the dashboard.
Step 1: Declutter
It might seem an obvious move, but getting rid of all the accumulated stuff in your car will make it look like a different place. Go through all the things you have stowed away in the glove box, center console, and the trunk. Remove or reorganize the stuff you have there, making sure you return only the essentials. Take a good look around the interior, and get rid of the garbage. Usually, there will be sweet wrappers, or parking receipts lurking in the depths, under the seats or hidden in the bottom of a door pocket. Recycle what you can, and throw away the rest.
Step 2: Floors and Carpets
The carpets and mats in a vehicle are probably the dirtiest part of the interior. If the rest of the inside is not particularly messy, then you could start here. If the rest of the interior needs a heavy clean, then you can always use the floor and carpet until last. Whichever way around you do it, make sure any stray coins or food wrappers are removed. Slide the seats forward and back to check nothing is lurking underneath. If you have floor mats, remove them and give them a good shake to remove any dirt and debris. Use the vacuum cleaner to get rid of the stubborn dirt. If that is not enough to remove any caked on mud, a jet of water should do the trick. Allow them to completely dry in the air.
For the carpet in the vehicle itself, first, use the vacuum with a brush attachment to remove the dust and dirt. To be thorough a steam cleaning machine can be used to get rid of any stains. A small handheld steamer will work well, as it will be able to get into all the crevices a bigger machine will find challenging. Some domestic carpet products will do the job of getting rid of stains, usually by a simple application, allowing the product a few moments to work, and then either brushing or vacuuming the residue. Try not to too wet the carpet inside the vehicle. If dampness is allowed to linger, it can prompt the growth of mold and bad odors.
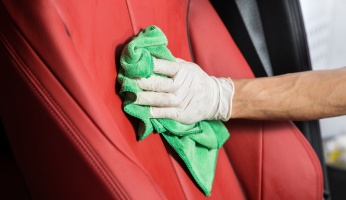
Step 3: Seats
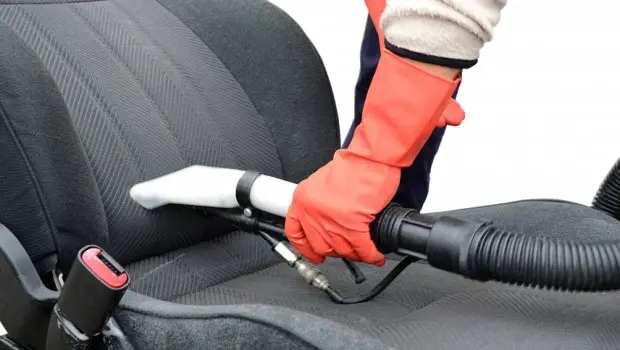
Vehicles have three types of upholstery, leather, vinyl, and cloth. Each needs a different method of cleaning. Whatever the upholstery, the first thing you should do is give the seats a thorough vacuuming to get as much dirt off as possible. If the front seats have a reclining option, tilt them back so you can get in between the seat and the back cushions.
Leather:
Leather has a grained surface, so over time dirt can get embedded in the grain and detract from its natural beauty. The additional trapped dirt can change the shade of light colored leather to something less appealing. Most leather cleaning products will get rid of the ingrained dirt, and leave the leather looking like new again. Apply with a soft cloth or towel, making sure you turn it regularly as the dirt comes out of the leather. Polish with a microfiber cloth to dry off the leather. Leave it for a couple of hours before applying a conditioner to give some oils back into the leather to return the original suppleness.
Vinyl:
Much the easiest type of upholstery to clean. Many household products work well-cleaning vinyl upholstery, including some glass cleaners. Check using an out of the way spot if you are not sure the cleaner is suitable for the vinyl used in your car’s interior. Use one cloth to apply the product, and another to dry.
Cloth:
The degree of soiling will determine the strength of cleaning product you will have to use. Household upholstery cleaners will work well, but remember that the more liquid you use on the seats, the longer they will take to dry out. Some fabrics will just soak up the moisture and may never dry out completely, giving a car a damp and musty smell. If the seats already smell musty, sprinkle baking soda on them and leave. After a few hours vacuum the soda and your seats should smell fresh once again. The longer you let the baking powder sit, the more odors it will absorb, so try it overnight.
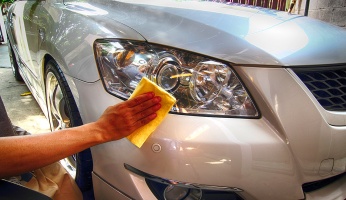
Step 4: Glass Windows and Mirrors
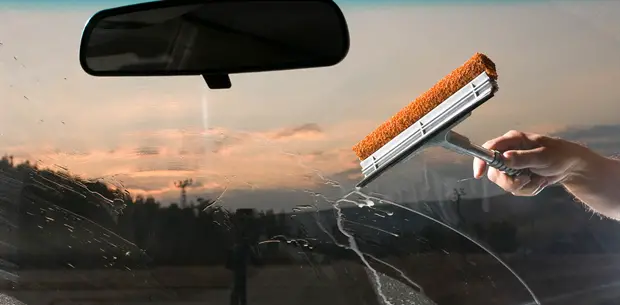
Provided the windows and mirrors on your vehicle have not been tinted a household glass cleaner and a microfiber cloth will do the job. However, if the glass does have a tint or tint coating, it may be affected by the ammonia in the cleaning product. In that case, it is better to use a glass cleaner specifically formulated for cars. Remember to spray the cleaner on the cloth, not on the glass. This prevents smearing and getting the product on other surfaces it might damage. Don’t forget to roll the windows down a little to reveal the edge of grime that always gets caught there. It is often overlooked. When cleaning both sides of a window, it’s often difficult to know if any smearing is on the inside or outside of the pane. Why not wipe the exterior with vertical strokes, and the interior horizontally, so you will be able to immediately tell which side is causing you smearing problems.
Step 5: Interior Panels
The front panel or dashboard holds all the switches and dials, along with air vents and can be a tricky thing to keep clean.
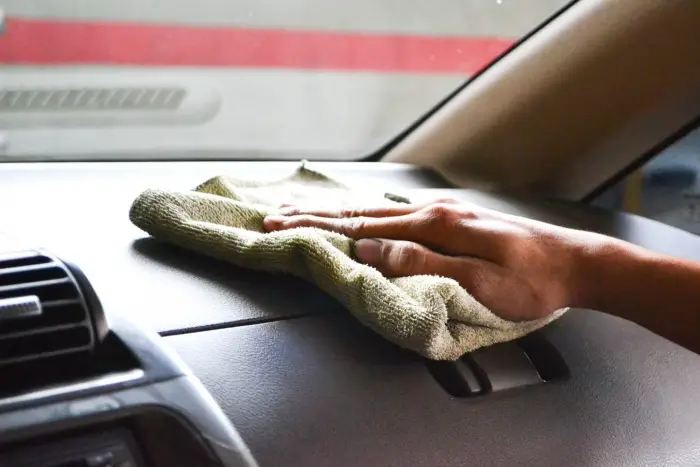
Dashboard:
The expanse of the dashboard ending in an apex where it meets the windshield glass can be an awkward area to clean. First off is to use a vacuum cleaner with a thin nozzle attachment to get as much of the dust as possible. Then you can use a soft cloth to get right to the edge where the dash meets the glass to remove anything left after vacuuming.
Console:
Dust and dirt can get into every crack and crevice of the driving console. The buttons and controls are a nightmare to clean. To get into those hard to reach places, a cloth wrapped around a flat-head screwdriver will do the trick. For tighter and more delicate places a thin cloth around a plastic knife should work too. As a last resort cotton swabs can find their way into most small spaces.
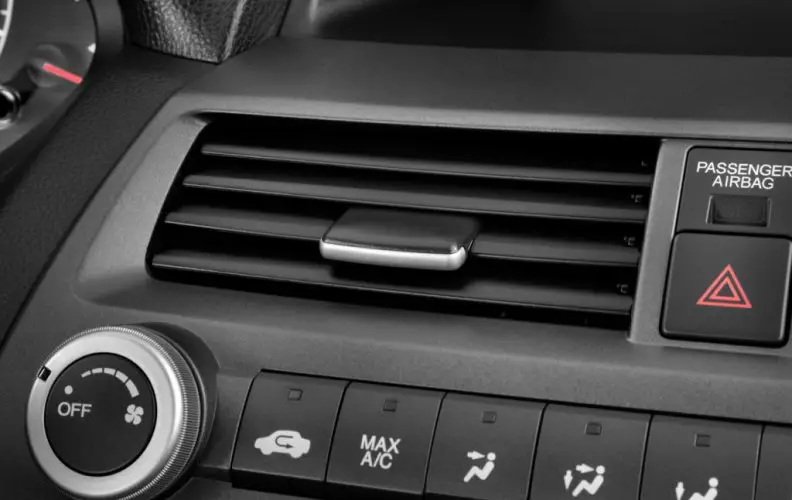
Air vents:
A long, thin brush is ideal for getting onto the fiddly bits of the air vents. Compressed air squirted inside the vent can remove a lot of the debris that has accumulated over time. It is probably best to do this before you do any other cleaning as it can send dirt and dust flying into the cabin.
Door panels:
The door panels in a vehicle are usually made up of other materials used inside the car. However, like the center console, they are likely to contain cup holders. The cup holders can be the filthiest place in the car, with the remains of sticky spills lurking in the bottom. A damp cloth should be enough to remove most of the dirt from these areas.
Step 6: Smells
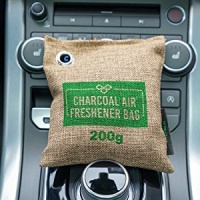
Once you have cleaned the interior of your vehicle, you probably won’t need to do it again for another six months. Rather than waiting for the interior of your car to look shabby and smell awful, get into the habit of regular cleaning. If your vehicle looks good on the outside and smells and looks good on the inside it could add hundreds or thousands of dollars to its value.