Bumper Repair: 17 Do-It-Yourself Tips
 Bumper Repair: 17 Do-It-Yourself Tips
drivrzone.com
Bumper Repair: 17 Do-It-Yourself Tips
drivrzone.com
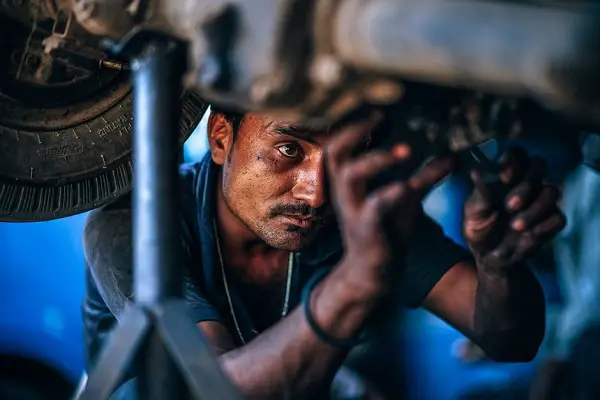
Back into something you shouldn’t have lately? How did that end – with a banged up bumper? Most accidents are covered under insurance, but sometimes it’s just easier to skip the middleman. If another driver isn’t involved and you just do minor damage then there’s no reason not to try and tackle the bumper repair yourself! DIY car repair is becoming more and more popular in the United States, mostly due to the rising costs of mechanic fees. It’s fun to do and can be a bonding experience between you and your children if you have any. Some people like hanging out in the garage for the simple solitude it provides. There’s nothing like getting your hands dirty with an extra-large side helping of silence!
Even if you’re a novice when it comes to working on vehicles it’s okay! Everybody starts out somewhere, and it’s the drive to learn that becomes your greatest asset. If you’re willing to make it work and put your back into it, anything is possible. We’ve made sure to include advice that can be easily followed by inexperienced folks. Most people at least try to have a go at solving a problem before calling the shop. Mechanic bills, like we said, are no joke! Whether it be changing your own oil, fixing small body flaws, or repairing your bumper, we have you covered. Today, we are focusing specifically on the last item on that list!
Maybe you didn’t realize that stationary objects have the right of way. Maybe it was a small bump into your family member’s vehicle you need to atone for. Maybe you even hit your second car while driving your main vehicle! Or, worse yet, perhaps you’re the victim of a hit and run where there were no cameras and no witnesses. Whatever the case, we’re here to help. After reading this handy list of how-to tips you’ll be ready to fix scratches, pop out dents, and paint like a pro. We’re going to go over the most common damage seen in bumpers. Along the way, we’ll give you some suggestions on extra materials you can use to make your life easier. We’ll also provide extra tips for a smooth, easy process. This will be broken down into four sections for easier digestion. If you’re having a specific problem, feel free to skip to it! We do recommend you read the entirety of this article, however, for some great information that may be useful later.
Fixing Scrapes And Scratches
This section will cover the solution to fixing small scrapes your car might have sustained. This is actually a fairly easy fix for most vehicles and requires little time and effort. It can be scary, and there are a few advanced steps involved, but it’s not too hard for a novice to accomplish. Honestly, fixing scrapes is probably the best place to start! Even if you mess up a little bit it won’t make much of a difference. Most people won’t notice a botched job unless it’s really and truly terrible. We have faith in your ability to carry it out with as little trouble as possible!
What You Need:
Custom Mix Spray Paint
Primer solvent
Clearcoat
1. Make Sure You Color Match
We recommend making absolutely sure you have the right shade of paint. You should be able to get your car color matched and find the correct color. The custom-made spray paint is exactly what this is for! It’ll contain the exact color you need for a seamless fix.
2. Avoid The Low-Cost Options
People normally run right to the body shop as soon as they see a nick on their bumper. This is exactly what you don’t want to do, however! Getting a cheap body filler and a matching can of spray paint is not going to get you the results you want. Invest in the proper material, even if it takes you a little to work up the money, and do it the right way.

3. Understand Bumper Anatomy
Most people don’t realize that the plastic part on the front of your car is not actually the bumper. Instead, it’s a covering placed over the real bumper in order to help keep repair costs low, and take the brunt of the damage. Underneath this cheaper material is a metal rod which protects the vehicle as a last resort if the damage extends beyond the plastic covering.
4. Get The Area Ready
You need to make sure you’re working with a clean surface. This means that you should always prep the area by giving it a little scrub and then drying it completely. If you leave the grime on you could end up damaging your car more, since abrasive dirt particles can do a number on paint. The solvents and other materials you’re using may not stick as well, either.
5. Pick Your Setting Wisely
Make sure that you’re working in a well-ventilated area. Paint fumes are noxious and can cause a range of ailments when inhaled. You definitely don’t want paint particles in your lungs! Your workspace should also be fairly clean and dry. This allows the adhesives to properly set so that they can do their job.
Popping Dents Made Easy
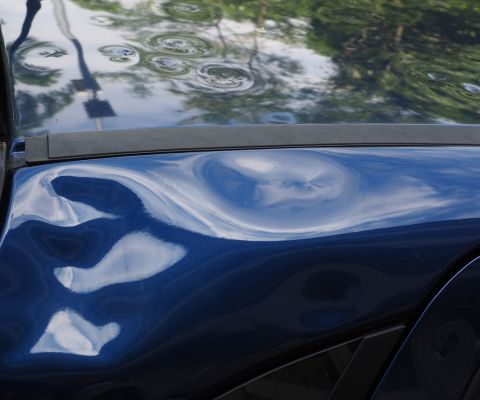
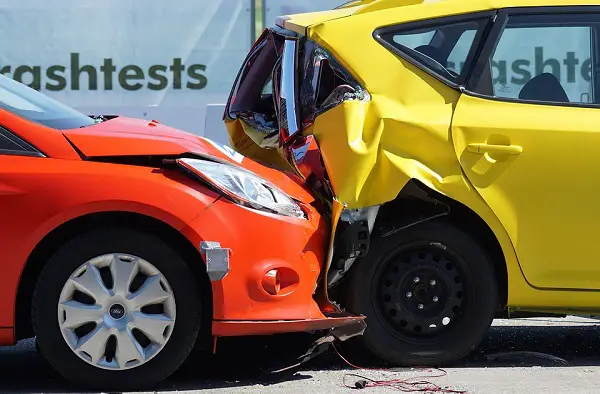
A common bumper problem is dents. These sometimes come in tandem with scratching, since it’s blunt force that causes a dent in the first place. We’re going to focus on just dents in this section, however. These can be pesky and can stick out like a sore thumb in the right lighting. Although dents are normally purely cosmetic you should get around to fixing them, anyways. This simple step can up the resale value on your car, and definitely makes your car look 100% better than it did.
Suggested Extra Materials:
Insulated Gloves
Towel
Extension Cord
6. Check The Temperature
If it’s cold outside then you should probably head indoors to do this. Cold materials react differently than room temperature material to boiling water, which is an essential part of this process. Make sure you’re as close to room temperature as possible to avoid doing more damage than repair.
7. Put A Kettle On
In order to get your bumper to the point where it’s soft enough to reshape you’ll need plenty of boiling water. Use a kettle, or a pot, or whatever you have on hand. You’ll probably have to repeat this process a few times, but it’s worth it for the results.
8. Keep It Hot
You may be wondering where the towel comes into play. Well, it’s not for drying off, that’s for sure! You’re going to use it to keep the water in contact with the bumper. Extending this contact will give you a quicker, better result. It’ll help the bumper more thoroughly, and at a quicker pace. Beware of the hot water, however.
9. Use Gloves
Insulated gloves can save you from a world of misery. They protect your hands from the hot water and offer you assurance. The last thing that you want is to accidentally burn your hands while you’re fixing your bumper. Landing yourself in the ER, and doing what could possibly be permanent damage, isn’t an ideal situation in the least.
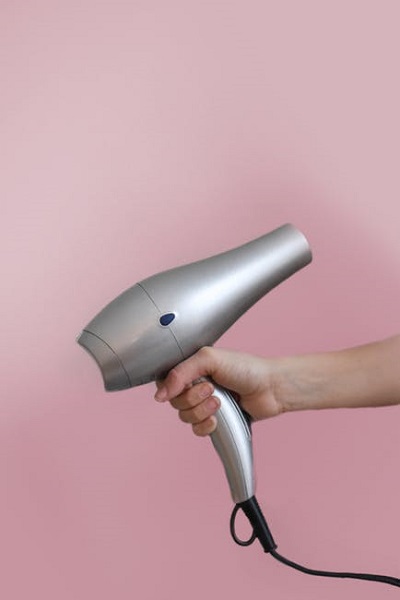
10. Don’t Overheat
Make sure to make sweeping motions when you move on the hair dryer phase. This will ensure you don’t heat any one piece of the bumper for too long. It’s exactly like blow drying your hair! Even heating is the way to go. This is also where the extension cord comes into play. This is to ensure that your hair dryer can reach the bumper in the first place.
Cracked Bumper Be-Gone
Is there a crack driving you crazy? Well, there’s a fix to keep you sane. Cracked bumpers can be caused by a variety of reasons, but the end result is always the same. Frustration, that is. How does that saying go, again? Oh, yeah. Don’t get mad, get glad! We know it’s a super cliche, but it applies to DIY repair in general. Be happy that you’re able to get it done at a fraction of the cost, no matter the problem at hand.
Suggested Extra Materials:
Custom Mix Spray Paint
High-Quality Welder
Epoxy Glue
11. Consider Your Options
In this case, DIY may not be the best option. There are definitely times when it’s time to throw in the towel and replace the entire bumper (more on that next). If you really are struggling to get that crack fixed then you know that you need to buckle down and get a new one.
12. Get The Good Glue
If you want your fix to last then you need to invest in the materials you’re using. A high-quality welder is important, but so is the epoxy you choose. There are several great options on the market for you to choose from. If you’re unsure of which glue is right for you don’t be afraid to ask the store clerks. Automotive stores are normally pretty good about hiring people with a clue. They should be able to direct you to the right glue for you!
13. Accept The Imperfections
Unfortunately, if you aren’t a real mechanic and you aren’t working in a shop you’re bound to make mistakes. That’s okay! It’s part of the learning curve, after all. Most people won’t notice small inconsistencies on your bumper… and if they do then they’re looking too closely, anyway. You’ll want to mention this to any potential buyer, however, when you sell your car. It’s good form to let people know what repairs you’ve done in case anything goes wrong down the road.
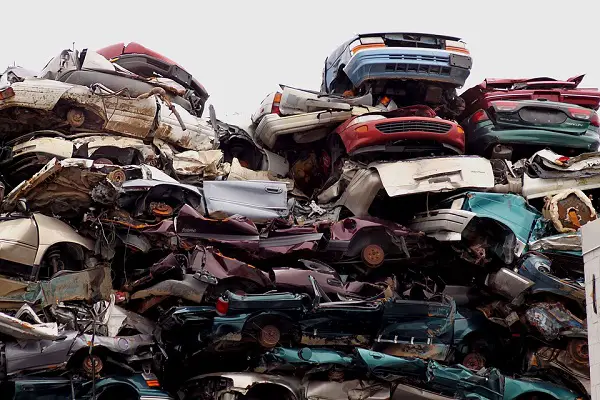
Whole Bumper Replacement
There may come a time where all else fails. Sometimes you screw up the repair and damage the bumper beyond repair (happens very rarely!). Other times you might just have to accept that there are too many repairs to be made. Rather than stress about getting more work done than you can handle, you can always just replace the whole thing! This isn’t nearly as hard as it sounds, and if you take these tips into consideration you’ll have a much easier time.
Suggested Extra Materials:
A Knowledgeable Friend
An open, spacious workplace
Custom Mix Spray Paint
Face Protection
14. Junk Yard Bargains
Sometimes you can find stellar deals on car parts at junkyards. You can look up the numbers to the businesses in your surrounding area and ask them if they have the bumper you need. If you really want to save a buck you can even get one in the wrong color. It doesn’t take a whole lot of time or effort to repaint a bumper, after all! Please do note that you’re going to want to ask a friend with a truck, if you don’t have one, for help. The bumper will obviously not fit in a sedan, or most other vehicles without an open bed. You might be able to get away with it in an SUV, but you’re taking some chances.
15. Be Honest About Your Ability
When it comes down to it some jobs are harder than others. It’s important to make sure you’re up to the task! If you aren’t then maybe you have a friend who’s in the automotive industry or somebody who just loves to work on cars. They can aid you in the process, and act as your mentor while you’re learning. Don’t be afraid to ask around! Even if it takes paying them it will still probably be a fraction of the cost a real shop would charge.
If it comes down to it then take your car to the shop. This should be your last option, and rarely needs to be done, but it is something to consider. It’s better to throw in the towel than end up with more wrong than there was in the first place.
16. Two Is Better Than One
This is a little different than the above tip. Hear us out! Changing a bumper is a big job, and can require the work of more than one person. It’ll help speed things along, too, and the company is sometimes nice when you’re doing a long, intensive repair. Keeping morale up is important. It’s a perfect excuse to hang out with a buddy and have a couple of beers while you’re at it. Turn it into a party! It doesn’t have to be all work and no play. Even if that person happens to be clueless they can still provide raw effort that you may need. And, of course, two is always better than one!
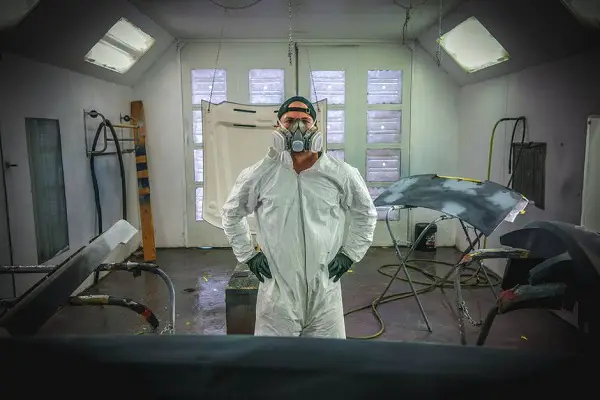
17. Use Personal Protection Equipment
Our final word of advice really does apply to every repair you do that involves spray paint. You need to wear a mask that will protect your lungs from damaging particles of paint. You should also wear eye protection! We refer to these items as “PPE”, or Personal Protection Equipment. This is an invaluable set of wearables that’ll keep you from doing lasting damage to your insides, or eyes. You can find these materials are your local hardware or automotive store. They’re pretty cheap, and totally worth the extra cash. There are white jumpsuits you can use, made of plastic, to protect the rest of you, as well.
So, as you see, DIY bumper repair isn’t that scary at all. It takes a little force, and a little time, but the results are well worth it. You can save up to a thousand dollars by tackling the problem yourself! That’s definitely worth doing. Mechanics charge astronomical rates, and with good reason! We can’t knock the professionals who fix our cars when we can’t, after all. They go to school and spend a lot of time mastering the art of car repair. We don’t mind paying the bill when it’s necessary. It’s just a question of how necessary it is!
You’ll come to find that most DIY repairs can be done fairly easily by almost anybody. No matter what the repair or how lost you are, Motorful is always here to help you out. Be sure to check out our other articles for more information on different fixes you can do all by yourself.
Sources
- Auto MD – How to Replace a Front Bumper
- YouCanic – How to Fix a Cracked Bumper Yourself
- YouTube – How to Repair and Paint a Plastic Bumper Cover for Beginners