How to Rotate Tires: A Do-It-Yourself Guidedrivrzone.com
We all hear that we should get our tires rotated, but what exactly is it and is it something that we can do ourselves? Let’s find out.
What Is Tire Rotation?
Tire rotation is when each of the wheels is taken off your vehicle and moved to different positions. This is done to make sure that your tires last longer and wear evenly.
DrivrZone.comHow Often Should It Be Done?
Tires need to be rotated as often as the manufacturer of your vehicle recommends it, you can find this information in your owner’s manual. A good rule of thumb though is every 6,000 to 8,000 miles. You should inspect your tires on a monthly basis for wear and rotate them as soon as you notice any wear, even if this occurs before 6,000 miles. It doesn’t matter which vehicle you have.
Benefits of Rotating Your Tires
The position that a tire has on your vehicle can affect the way it wears, rotating the tires on a regular basis helps to make sure that all of the tires wear evenly, which can improve their performance and extend the life of the tires.
Rotating the Tires
When tire rotation in completed at the recommended times, it can preserve traction and balanced handling while evening out the wear on the tires.
Many warranties for tire mileage require the tires to be rotated in order for the warranty to remain valid. Some people even recommend getting them rotated every time you change the oil in your car. When you do get the rotated, it is also a good time to have them balanced if you have noticed any sort of vibration while driving. Also, during rotation is a great time to:
look over the tires for any sort of damage,
to remove any debris or stones from the tread,
to check for any sort of uneven wear by checking the depth of the tread,
and to check the pressure of the tires.
DrivrZone.comRotating the tires assists in evening out the wear of the tires by letting each of them serve in multiple wheel positions. Keep in mind though that rotating the tires will not be able to correct any wear issues that have been caused by having the tires improperly inflated or by worn mechanical parts.
Most vehicles have 4 tires, and typically, the tires in the front tend to do very different things than the tires in the back. Additionally, the tires on a vehicle that has front wheel drive are used in a different manner than those used in a rear wheel drive vehicle. That goes on to encompass vehicles like family sedans and performance vehicles as well. Each position of a wheel can lead to different rates of wear and even to different types of wear.
When all of your tires wear at the same rate, it is an advantage. This is because wear reduces the depth of the tread, it also allows each of the tires to respond quickly to the input of the driver, it maintains handling, all while increasing the cornering traction of the tires.
When your tires wear at the same rate, you will be able to get a whole new set of tires instead of buying them in pairs. When you replace all of the tires at once, you will be able to maintain the handling balance your vehicle originally had. Additionally, tire makers are constantly introducing new tires that all improve on their previous tires’ performance. When you replace all of your tires simultaneously, it allows for you to experience the technology of today as opposed to trying to match previous years’ technology.
Seasonal Changes and Tire Rotation
Drivers who live in the Snow Belt in America will have colder, more wintry weather than those living in the southern states will. Changing the tires with the weather is a great time for rotating the tires.
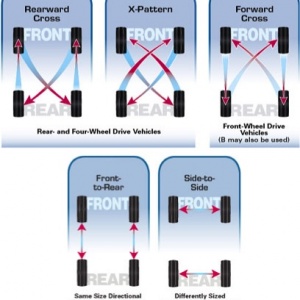
4 Tire Rotation
Which tire rotation pattern should you use? According to the Tire & Rim Association, there are 3 different rotation patterns that cover most vehicles that have non-directional tires on wheels that all have the same offset and size. The first pattern is the “Rearward Cross”, the second is the “Forward Cross”, the third is simply the “X Pattern”. You can use the X Pattern as an alternative to the other patterns.
The wheel trends and performance tires of today have presented the need for 2 more tire rotation patterns. These are:
DrivrZone.com
The “Front to Rear”, which can be used on any vehicle that is equipped with the same size directional tires or wheels, and the
“Side to Side”, which can be used on vehicles that have tires and wheels in the front that are different from those in the rear.
5 Tire Rotation
Most vehicles come with temporary spare tires that are not to be included in the rotation of tires. However, if the wheels and tires that are on the ground absolutely match your spare tire and wheel, you should include them in the rotation. Follow the tire rotation procedures that are specified in your owner’s manual, or if you don’t have the owner’s manual, you can put the spare tire on the right rear of your vehicle at each rotation. Put the tire that should have gone to that position in your trunk to use as a spare when you need it.
DrivrZone.com
If you have a front wheel drive vehicle that is equipped with a matching full-size spare tire, you should use the forward cross pattern for rotation.
If you have a rear wheel vehicle or one that is 4WD and is equipped with a matching full-size spare tire, you should use the rearward cross pattern for rotation.
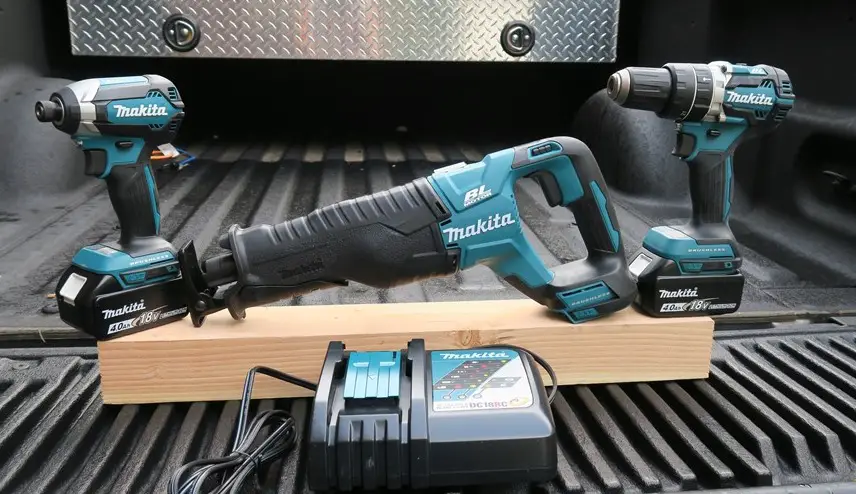
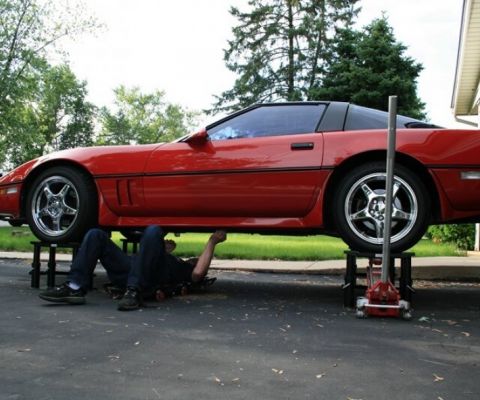
To get ready to do this procedure yourself, you will need the tools listed above and a plan for the tire rotation. Most of the tools are basic ones that you should already own. The car needs to be completely off the ground for the rotation. If you don’t have all of the jack stands you need, you might be able to use large wooden blocks (not cinder blocks).
DrivrZone.com
Before you begin taking the tires off your vehicle, you need to figure out which tire will go where. You should check the size of the tires. If the ones in the front are a different size from those on the back, you only need to rotate them side to side as opposed to front to rear.
The next step is to look at the pattern. The tires might be directional or non – directional. Tires that are directional will feature tread that goes in one direction and they usually have grooves that will work to channel any grit and water outward. Tires that are non – directional all have the same appearance. This matters because directional tires will not be able to switch to the opposite side. This is so that the water and grit can be channeled the right way. Non – directional tires can be switched to any position.
Directional Plan
After you have figured out the pattern type on your tires, you will be able to plan the rotation. Directional tires will only be able to be switched from the front to the rear. Make sure you keep them on the same side that they were originally on. This can make planning easier since you just have to switch them between the front and the rear each time that you rotate them.
Non – Directional Plan
If your tires are non – directional, the typical pattern would be to start on the front driver’s side of the vehicle and move it to the rear on the passenger side. The front tire on the passenger’s side will be changed to the rear on the driver’s side.
Pro tip – You can mark each of the tires with chalk so that you can remember which one goes where.
Time to Start
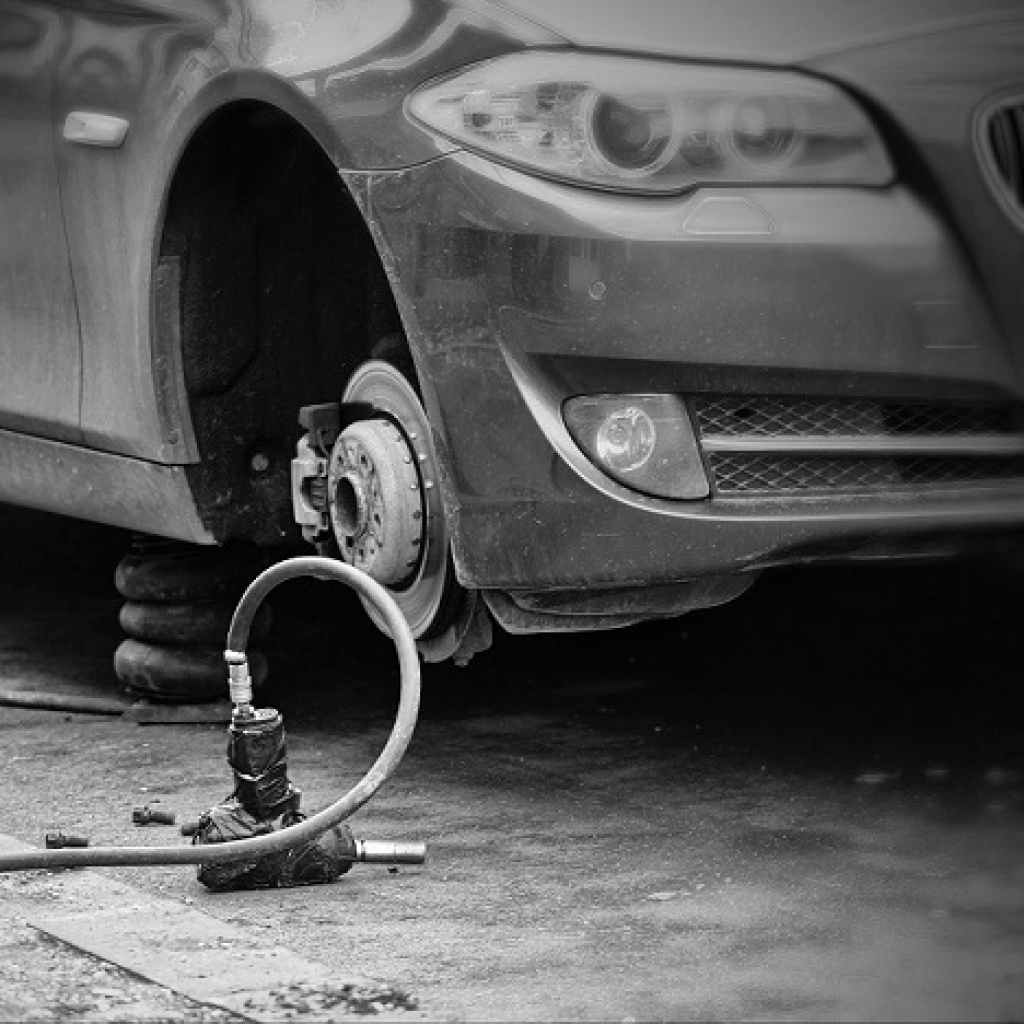
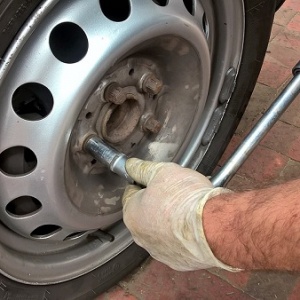
When you are ready to get started, park the car on a surface that is flat and set your parking brake. If you have a manual transmission, make sure that you put it in first gear. Block each wheel with either wheel chocks or a wood block. Go to each tire and take the hubcaps off using your flathead screwdriver. Once that is done, you can loosen the lug nuts with your wrench. Do not remove them completely yet.
Lift the Car
Using your jack, raise each corner of your car, making sure to slide a jack stand under the vehicle each time. Use your owner’s manual to determine the best place to put the jack stands. If you don’t have the owner’s manual, use any solid part of the frame.
Swapping the Tires
DrivrZone.com
Once you have raised the car and put it on the jack stands, you will be able to take off all of those lug nuts you loosened. You can use the hubcap to hold them and keep them near the axle you took them from.
Roll the tires to where you will be putting them and put them on the studs. Put the lug nuts back on them and hand tighten them. Using the jack, lower the vehicle, removing each of the jack stands as you go.
Your tires will be a bit wobbly, and this is fine at this point.
Finish Up
Once you have the car back on the ground, it will be time to replace the hubcaps and tighten all of the lug nuts. Tighten them using the star pattern. Just tighten them in the pattern of a star. Most vehicles utilize this pattern and feature either 4 or 5 of the lug nuts on each tire. Check each of the tires for the proper air pressure and that is it!
 How to Rotate Tires: A Do-It-Yourself Guide
drivrzone.com
How to Rotate Tires: A Do-It-Yourself Guide
drivrzone.com