Parallel Parking Tips For Beginner Drivers
 Parallel Parking Tips For Beginner Drivers
drivrzone.com
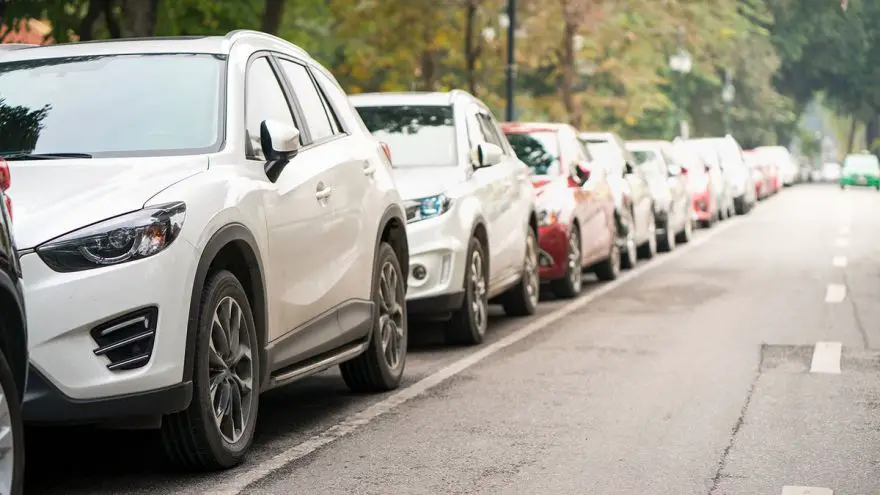
One of the harder techniques required to pass a drivers exam is parallel parking. It’s something that is required to know especially when living or driving in cities. Typically street parking is set up for parallel parking rather than angled parking. The issue is that it isn’t just difficult for new drivers, it’s a difficult task overall. It requires a very specific technique in order to do it correctly, avoid hitting other vehicles and also to not end up several feet from the curb. This post will go through some tips to help educate but also to help perfect your technique.
- The first thing you want to do when practicing parallel parking is practice on less busy streets. When you are on single lane roads the drivers behind you or approaching you will need to drive into oncoming traffic to get around which is dangerous. And having to park with someone waiting behind you will cause you to rush. When practicing it’s important that you are not rushing. Rushing will not only end with you either hitting the vehicles around you or the curb, but it can also be anxiety-inducing. Remember that the drivers around you don’t know that you are practicing and they may lose patience easily. For now, practice on calmer streets or at the very least double-lane roads.
- You want to ensure that the vehicle you are driving can fit into the space you want to parallel park into. If you are a first time or new parallel parker it is wise to choose a much bigger space than those you may have seen others fit into. It takes skill to get into smaller spaces and in the initial stages, you want to park in a big enough space to leave room for error so that you can avoid scratching or denting up the surrounding vehicles. The spot you are about to parallel park in should at least be one and a half the size of the vehicle you are driving as a rule of thumb. Drive up to the spot and align your vehicle next to the spot to get an idea of whether the spot will fit your vehicle.

- Now that you’ve chosen your spot on a calm road align your vehicle nose to nose with the vehicle in front of the spot you are about to park in. Your car should be about 2-3 feet away from the vehicle next to you at this point. Now you want to put your vehicle into reverse and when your vehicle is about halfway down the line of the aligning vehicle start to turn your steering wheel to the right (to the left if you are parking on the left side, like on a one-way street). When the vehicle is at about a 45-degree angle to the curb starting to straighten the wheel back out again. This action should straighten your vehicle out into the spot nice and snuggly. Your car should be about 12 inches from the curb.
- If your car is too far from the curb you didn’t back in far enough when getting into the 45-degree angle. Try pulling out, aligning your car again and try backing up again while turning your wheel to the right. This time back in a little further than before, then straighten out. See if this time you were closer to the curb.
- If your car hits the curb then you backed in too far. As in # 4, pull back out, realign your car and back up while turning the steering wheel to the right except this time don’t back in as far.
- If neither of these change the outcome of your park then it may be how you are turning your steering wheel. Turning your steering wheel to the right should be mildly sharp but not too aggressive. If you aren’t sharp enough then you’ll end up fairly far from the curb however if it is too aggressive you could end up hitting the car in front of you. It is very important that you are moving very slowly. The slower you go the more control you have over the angle and its alignment. As you start
 doing this more you will start to get into the groove of it and it will become very much second nature. As you get comfortable you will be able to pick up the pace. Right now, though, take it slow, watch where you are going and stop and restart as many times as you need in order to really understand the length of your vehicle and how sharp of a turn is required.
 - All vehicles are different so learn yours before you start using other vehicles for practice purposes. It really is about learning how to park in your vehicle and if you attempt to learn in new vehicles at the same time it will only cause additional confusion and frustration. Practice, if possible, in the same vehicle until you feel more comfortable with parallel parking.
Other items to consider when parallel parking
- Parking to the left can feel very different than parking to the right. It requires a similar technique but may need to be slowed down even further in order to get used to the feeling of it.
- Parking on a hill is also very different, there will be a lot more force and the break will need to be applied more frequently than the gas. Again, better to practice on flat surfaces first.
- You will need to look behind you (like shoulder checking) rather than relying on the side and rear view mirrors. Make sure that you can completely turn your head back to look out of the rear window.
- Consider using cones or pylons for your first couple tries, this way there is no fear of denting the vehicles around you.
- Also, consider asking someone to help you out. If there is someone else in the car you can ask them to get out and guide you. This is a better reading of how close you are to your surroundings and also help you gauge your surroundings for future attempts.

- When parking make sure that there is a good and even amount of space between the car in front of you and behind you so that when they leave they can also get out.
- When leaving the spot, take a quick look before getting into the car to see if there is enough space behind and in front of you again. There’s a chance that since you’ve been gone the vehicles around you have changed and didn’t give you enough space to pull out. You may have to wiggle out (going forwards and backward a couple times to get out of the space).
- Use your signal light during both the entering and exiting process. This will let the vehicles driving around you know that you are either parking or exiting to help ease frustrations and make your intentions clear (this will help avoid accidents).
- Make sure that you are not parking in front of a fire hydrant and that there is parking in that area. The space you see may only be there because you can’t park in that space. Read signs and look for hydrants before parking.
- When getting out of the vehicle make sure to check your surrounding before opening your doors. Sometimes we get so focused on the technique we forget to notice our surroundings and there’s a chance other vehicles, bikes or passengers are approaching your vehicle.
Practice will ultimately make perfect. Don’t get frustrated, this won’t help you at all. This technique is not something that just comes naturally to people. This technique takes a lot of practice. After time you will get into the groove of it and it will become second nature. It’s also important to continue to practice. Once it’s mastered doesn’t mean it will stay mastered. It’s important to practice on a regular basis. It is also important to remember that when parking in a new vehicle it will feel very new again. Don’t get discouraged. Come back to this article and verse yourself in what to remember and start over again. You will have it again in no time. Happy travels!
Sources
- Young Drivers- Parallel parking techniques
- Teen Driving- Parking
- WikiHow- Parallel parking


